Three Tips to Integrate Outlook® into Your Real Estate Business
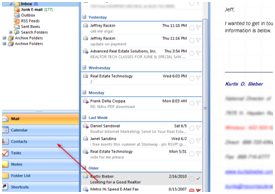
Being a REALTOR® for the last ten years, I have looked at quite a few contact database systems developed specifically for us REALTORS® and have come to the conclusion that the best one by far is Microsoft® Outlook®. The reason: in one convenient location, I can see ALL my emails, my calendar and my contact database–and they all sync together and can be merged with the drag-and-drop function.
So let’s discuss the top tips to put this all into play:
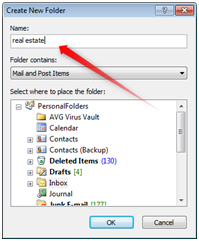
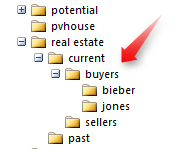
1) Create a systematic filing system in the inbox. My filing system is very simple and extremely effective. Right click on the inbox and choose New Folder, then name your first folder real estate. Right click on the newly created real estate folder and create a systematic filing system where you will keep all correspondence for an individual’s transaction. My filing system for a buyer would look like this: real estate –> current –> buyer –> jones. I would drag and drop all emails received from the title company, lender, cross-sale agent, the client and from myself in that folder. Never lose an email again, because after close of escrow (COE), you will simply move that jones folder into past.
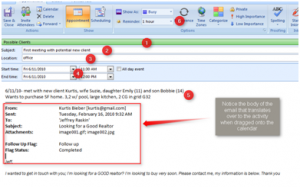
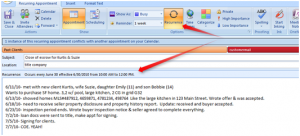
2) Once you receive that initial email asking for a meeting, after starting a folder as described above, drag it into the calendar. This will open up an appointment where you can:
- Color code the category as possible client.
- Put in the subject line with the event.
- Put in the location.
- Put in start and end times.
- Keep detailed notes of your conversation.
- Put in enough time to remind you of the appointment.
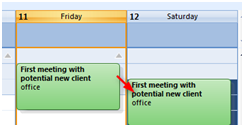
Once you save and close the appointment, you can drag it into a different time slot or day if the appointment changes. You can also drag the box to make the appointment shorter or longer.
As the transaction progresses, change the color coding of the category (to current client and, eventually, to past client). You can also put in multiple categories to put them on several lists, such as monthly email, good referrer, etc.
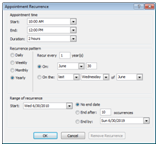
Here’s where the trick comes in. Take the timelines of the contract that you have to remember–such as the inspection period (10 days after acceptance), loan documents coming in (35 days after acceptance), signing at the title company (3 days later), close of escrow (2 days later)–and as you’re dragging them to the dates you need them completed by, push the Ctrl button simultaneously, which will create a copy of your appointment. That way, you will always know what you did in the past. Now you can just change the subject line of the event in the new day and add updated comments as the transaction progresses. At the end, click the Recurrence button to remind you of COE every year.
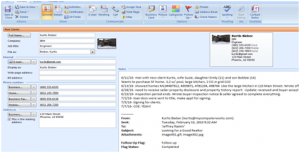
3) Drag the same email you started with to the Contacts section, where it will open up a new v-card (virtual card). As the name and email address will be auto-filled for you, simply fill out the rest of the information by typing in, or by dragging and dropping, the information in the Notes section in the respective fields (Mobile, Home, etc.). Copy and paste the last notes from the calendar section for this client to the v-card, add in a picture and the Details, even attach the HUD1 or the contract, and now you have an extensive contact card on this client. Sync this to your smart phone, and every time they call, you will not only be able to see their name but have a picture of them in front of the house, their executed contract and the notes you took throughout the process!
Everything is a drag-and-drop feature in Microsoft® Outlook®, including adding documents to an email instead of using the Paperclip –> Browse function. Outlook® does not have a monthly charge, and as they update the software maybe once every four years, it really is not a lot of money to get this most comprehensive and easy-to-use program on your computer. A little bit of practice and playing around to adjust the view to your own comfort, and you will become an Outlook® master.

